Drupal Layout Builder Tutorial
The Drupal Core Layout Builder module allows you to customize the design of entities such as content types, taxonomy, users, etc… with a new drag-and-drop interface. This is different from our commercial Drupal layout builder "DXPR Builder" because our product is only used to author and edit content, not content types.
Content editors always look for an easy-to-use experience when it comes to page building. Drag-and-drop and WYSIWYG tools are something they expect when they want to create and design pages. Drupal Core Layout Builder offers this exact experience with its easy-to-use page building capability in Drupal core.
Drupal Layout Builder allows you to select multiple sections for your page. For example one column, two columns, three columns and four columns, and you can specify each column's width.
Drupal Core Layout Builder can be used in two separate ways. It can be used to create a layout for each entity type on the website, and also to create a layout for an individual piece of content.
Enabling Drupal Core Layout Builder Modules from Drupal Core
Go to Extend and enable both Layout Builder and Layout Discovery module from Drupal core
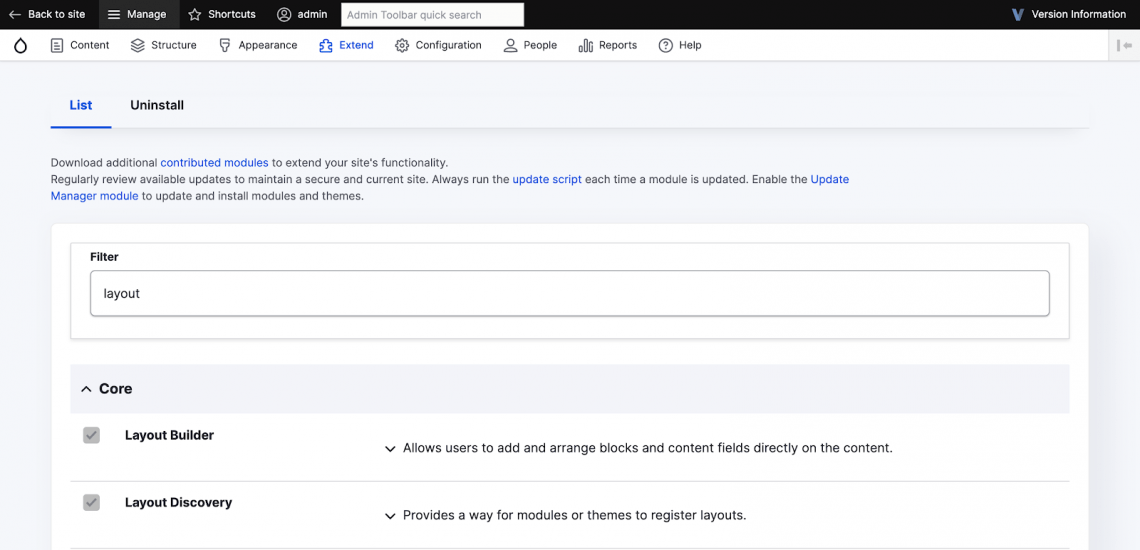
Or, if you use Drush run the following command to enable it:
drush en layout_builder
drush en layout_discovery
1. Use Drupal Core Layout Builder to Customize Entity Type
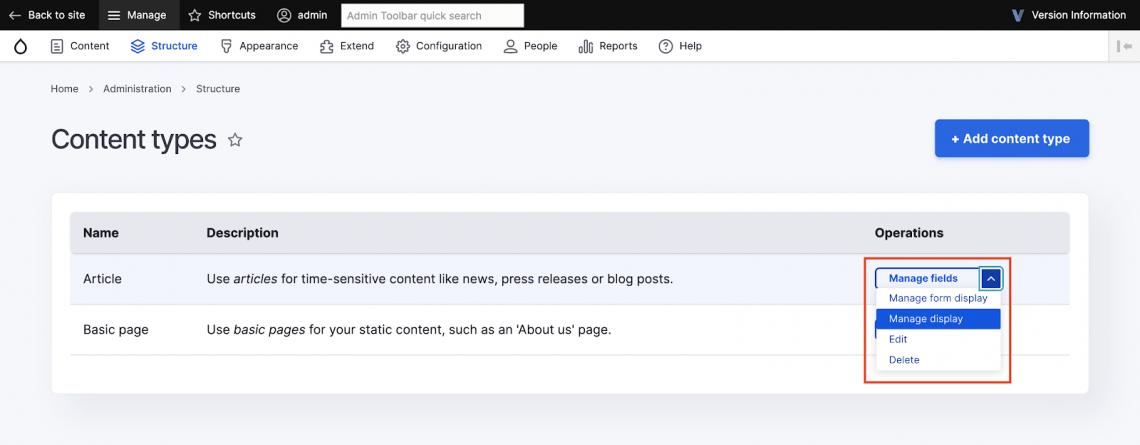
1. Once you are ready with enabling the modules, navigate to Structure, Content types and click on “Manage display” for any content type. For now we will use the “article” content type.
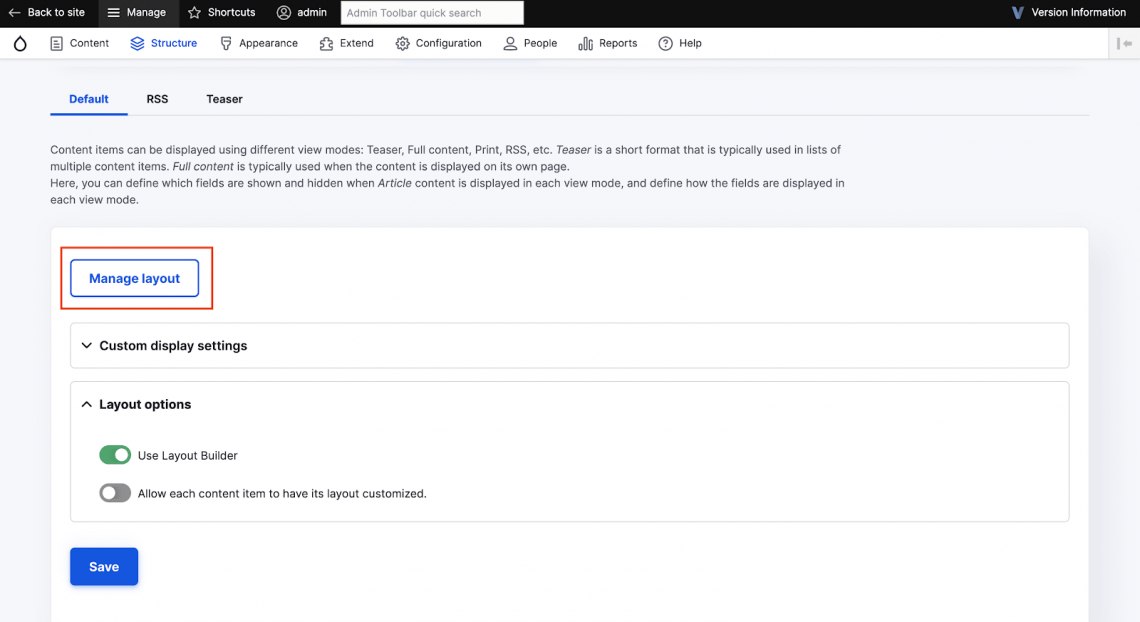
2. Scroll to the bottom; collapse Layout options and select “Use Layout Builder” then click on Save.

3. Once you’ve completed the above step, you can see a “Manage layout” option instead of field formatters.
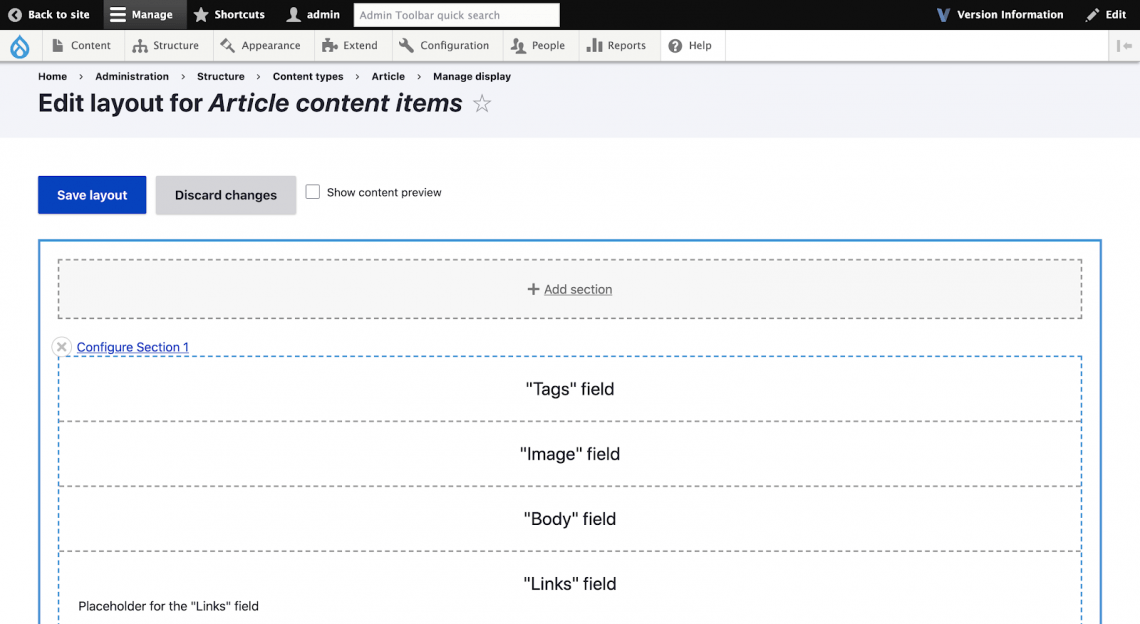
4. Click on “Manage layout” to go to the article content items, and the layout builder page.
2. Adding Sections to Layout Builder
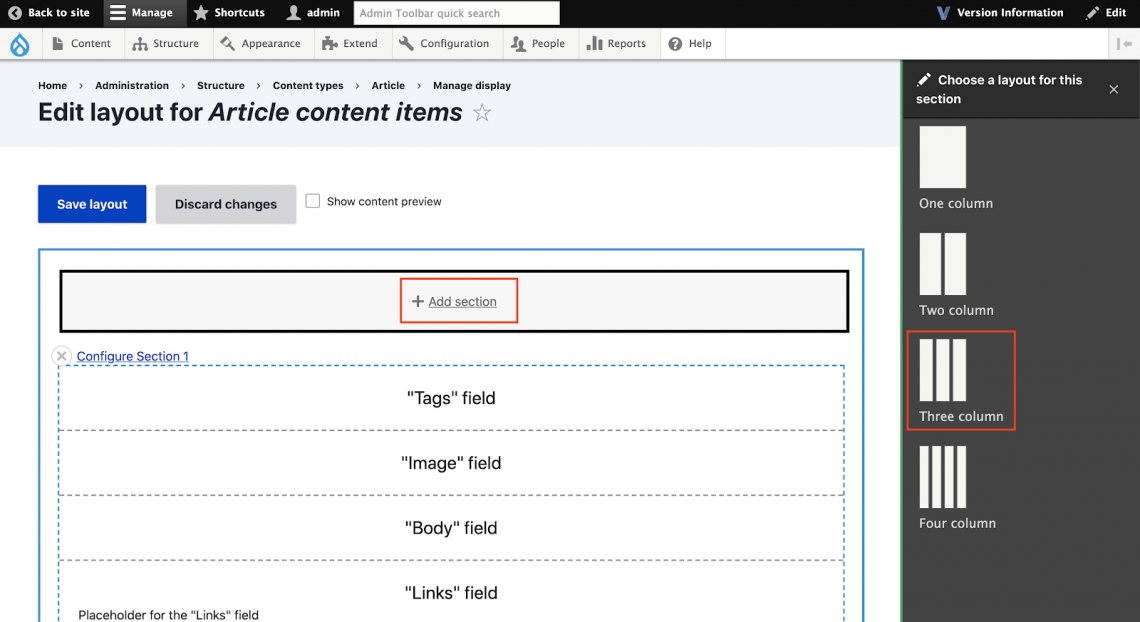
1. Let's add a few sections to our layout by clicking on the “Add Section” option. You will be provided with layout options for your section, on the right side of the screen. For now, let's select “Three column section”.
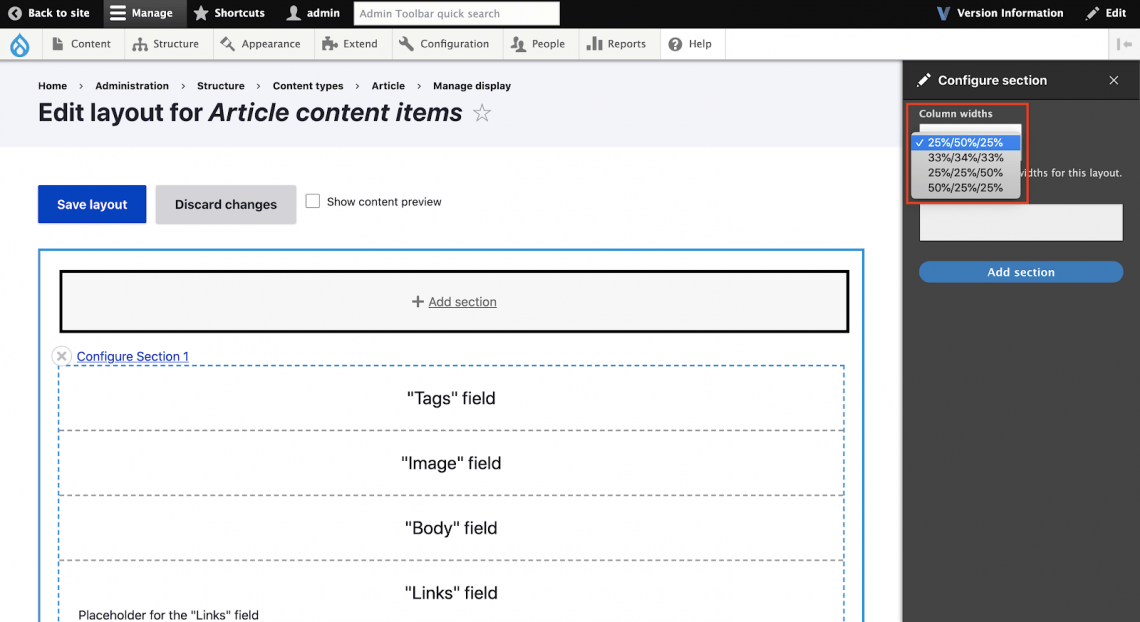
2. Once we select the “Three Column” section for our layout, it will display some variants, let's select “25%/50%/25%” for our layout.
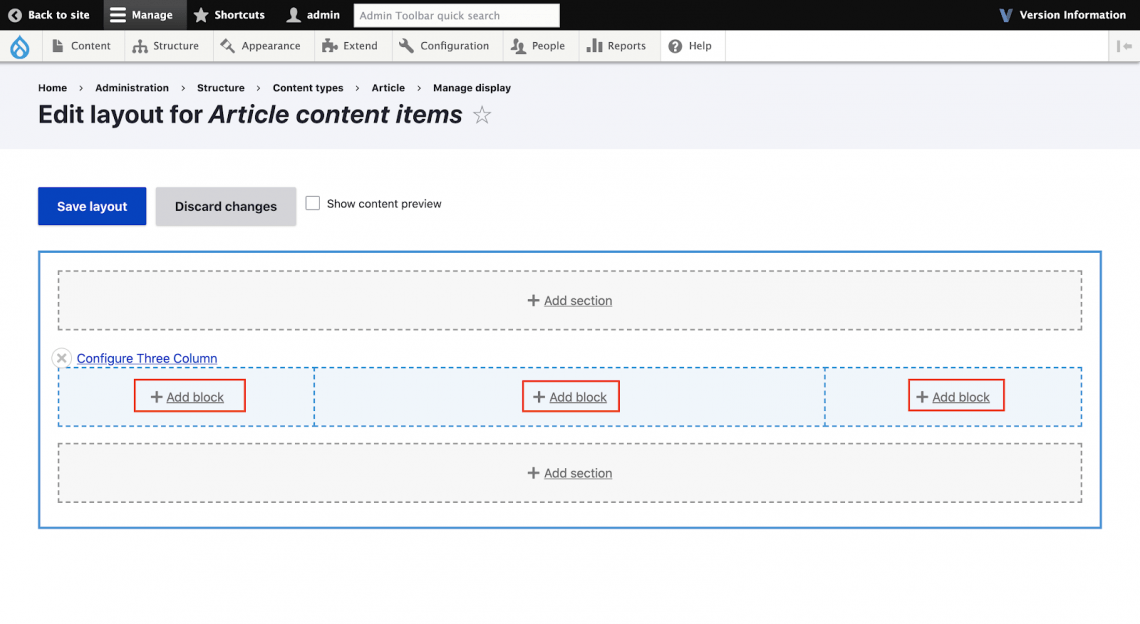
3. The layout with your selected width for each column is presented.
3. Add Blocks to the Section Regions
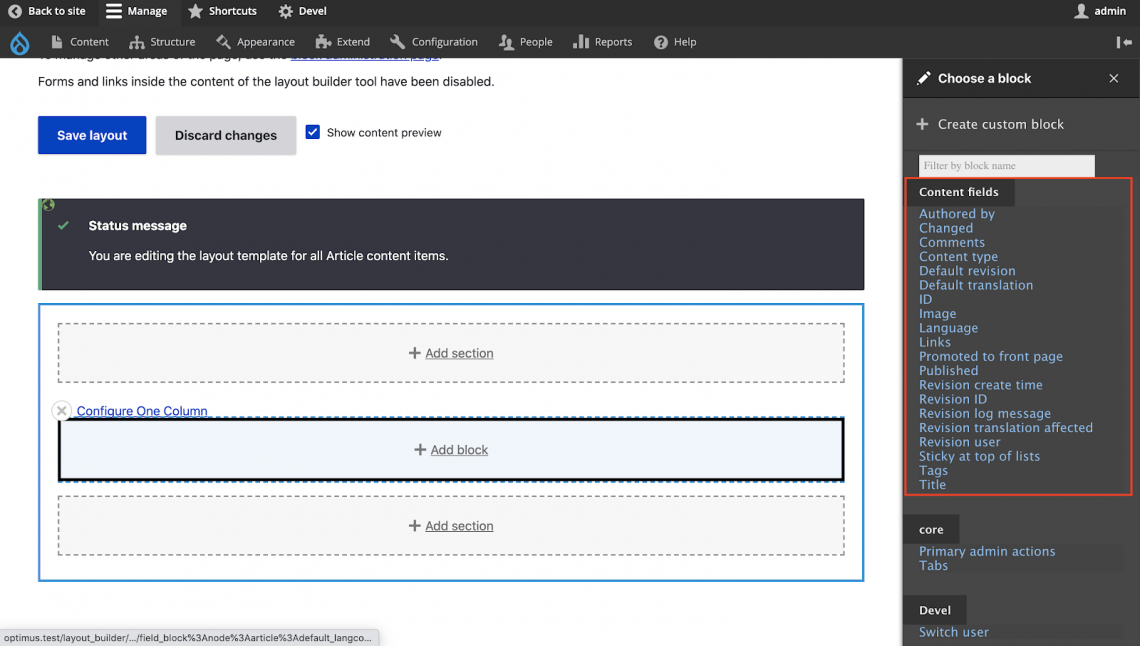
After choosing your section for the layout, you can add blocks to your section. To add a block just click on “Add Block” and the “Choose a block” option will slide out from the right.
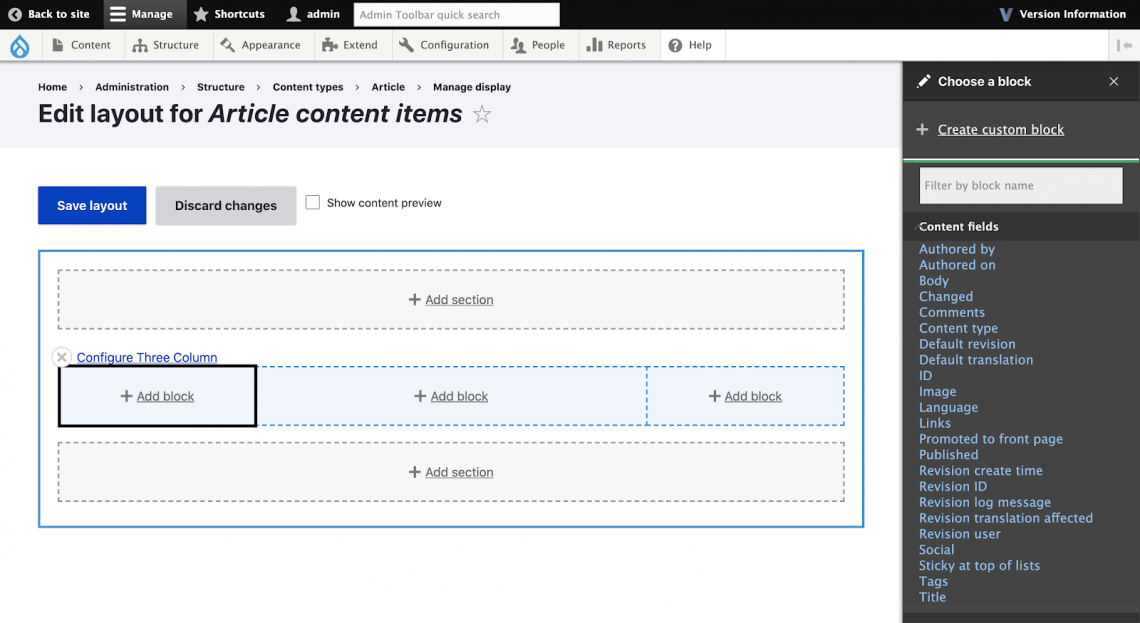
Let’s select the "Authored by" field to be displayed in our column

Let's add an image field for the second column and a custom block for the third column and save our changes by clicking the “Save Layout” button at the top.
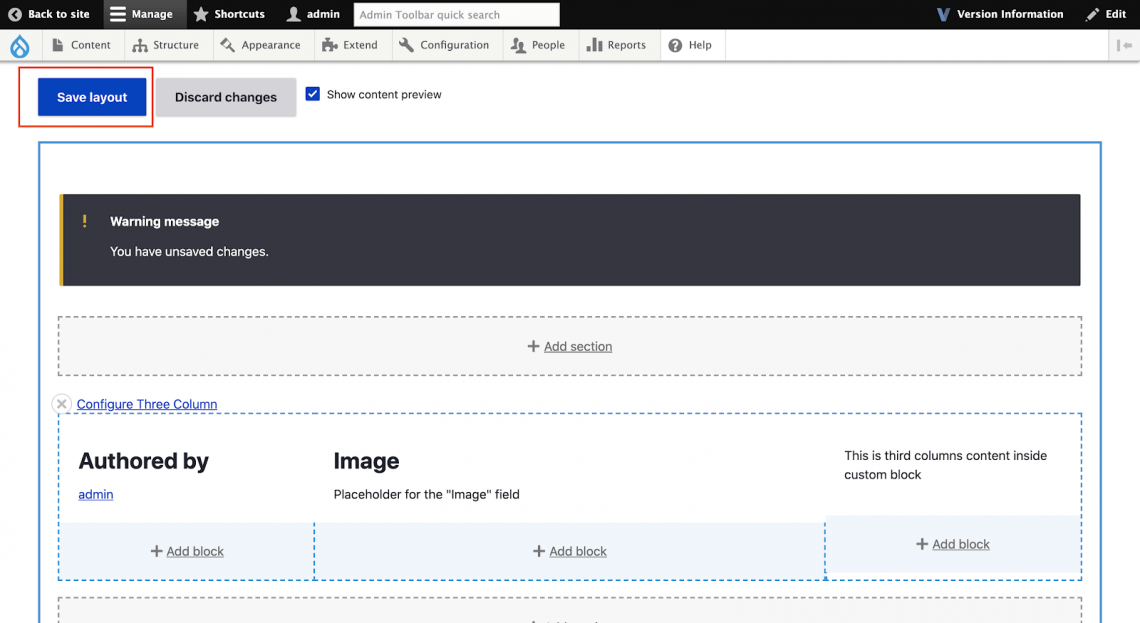
After saving this layout, if you visit an article content type page, you will be able to see a preview of the layout which you just built.

4. Override Default Layout
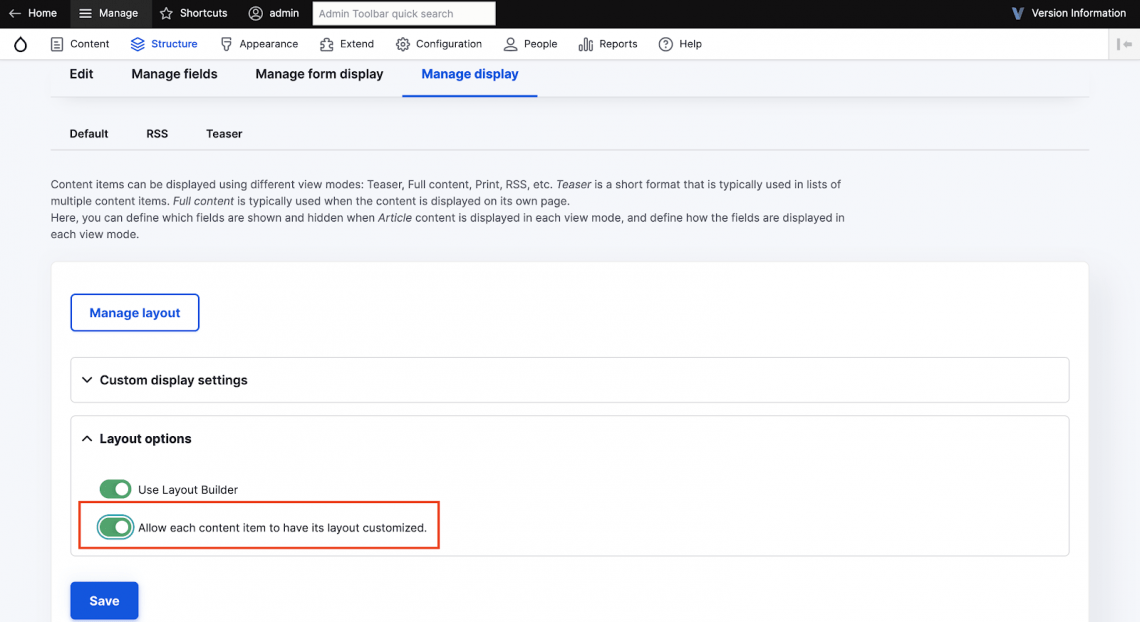
The Drupal layout which we just built for the article content type will be applicable to all the article content. If you want to build a customized layout for a particular article, you have to enable “Allow each content item to have its layout customized.” option in "Manage display".
Now when you visit any article view page, you will see "Layout" as a local task tab.

5. Restricting Layouts and Blocks
You can use contrib module Layout Builder Restrictions, to restrict layouts and disable the unwanted/unused layout from your layout builder
Install the modules using Composer, and enable it them your project, once done you will get the new "Default restriction" option in Manage Display of your entity
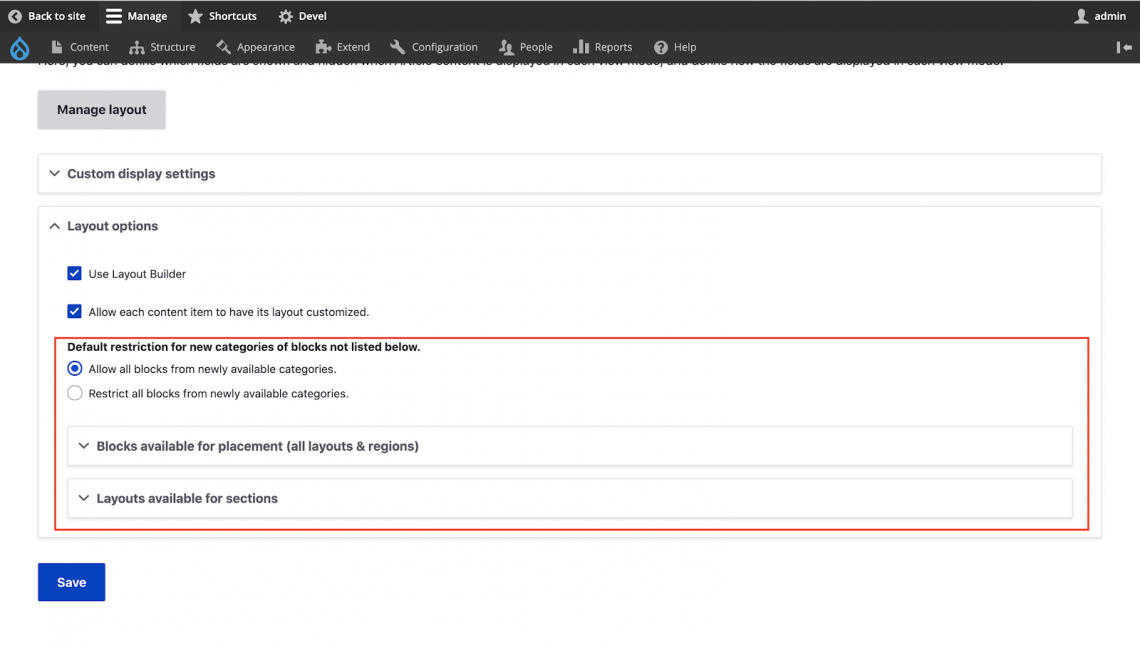
1. Blocks available for placement (all layouts and regions)
Under this option, you can control certain blocks, and whether they should be displayed in your selected layout builder.
For example, in the below screenshot, we are restricting only two fields from the content fields to be displayed in the layout builder, so "Authored on" and "Body" fields will not be displayed in the layout builder.
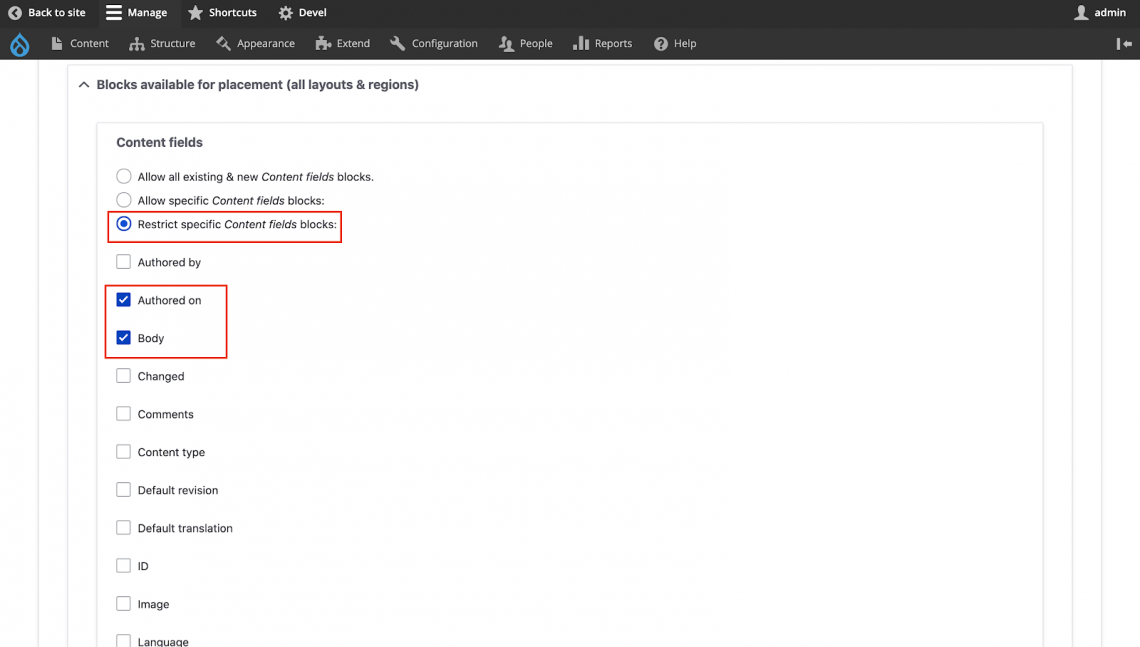
The "Authored on" and "Body" fields are not displayed, because they are restricted under content fields.
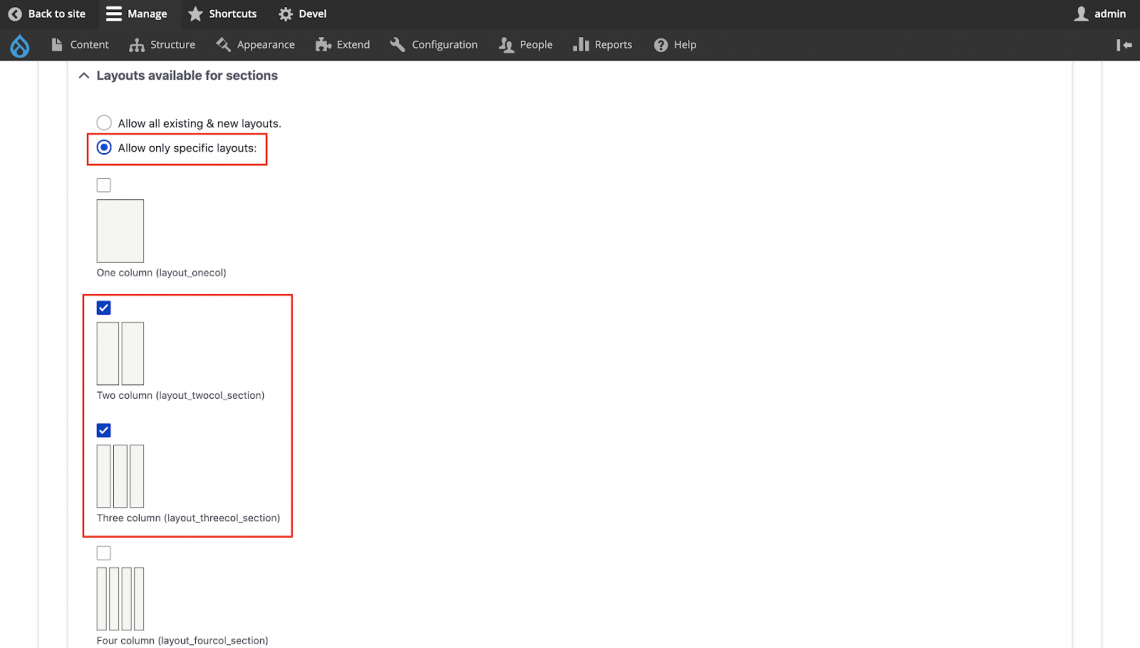
2. Layouts available for sections
In this option we can restrict particular layouts to be selected in our layout builder, so we will have the layout we need instead of all the layouts
For example, we will select a Two Column and Three Column layout to be used in our layout builder, so we will get only Two Column and Three Column layout options to be used in our layout and not all layouts.
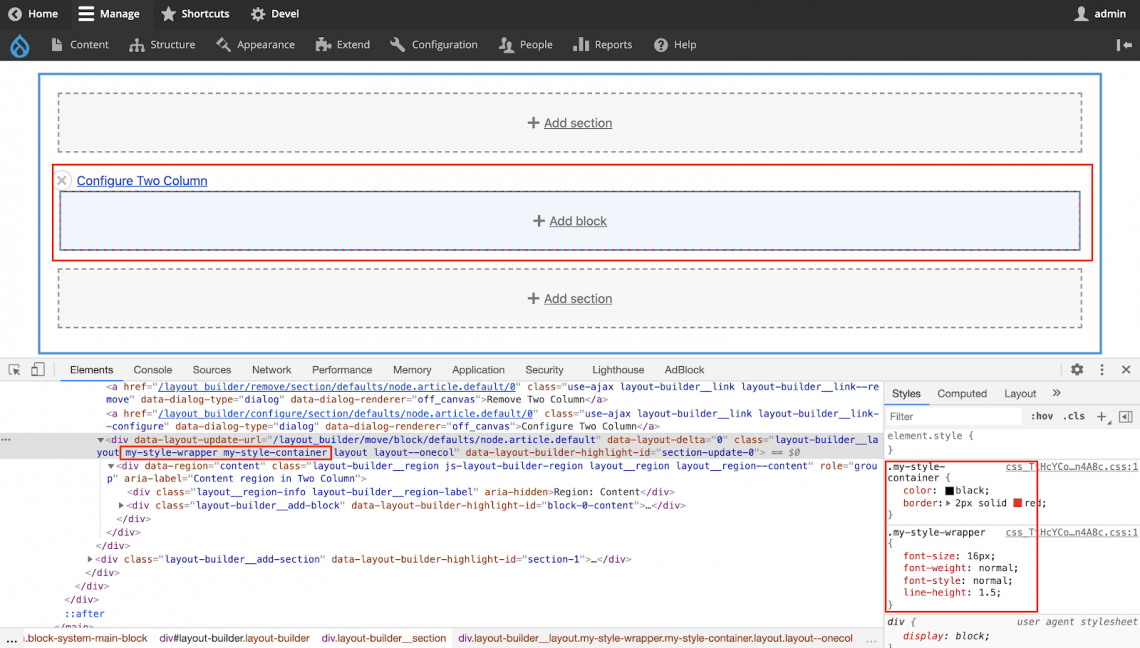
6. Applying Styles for Layout Builder
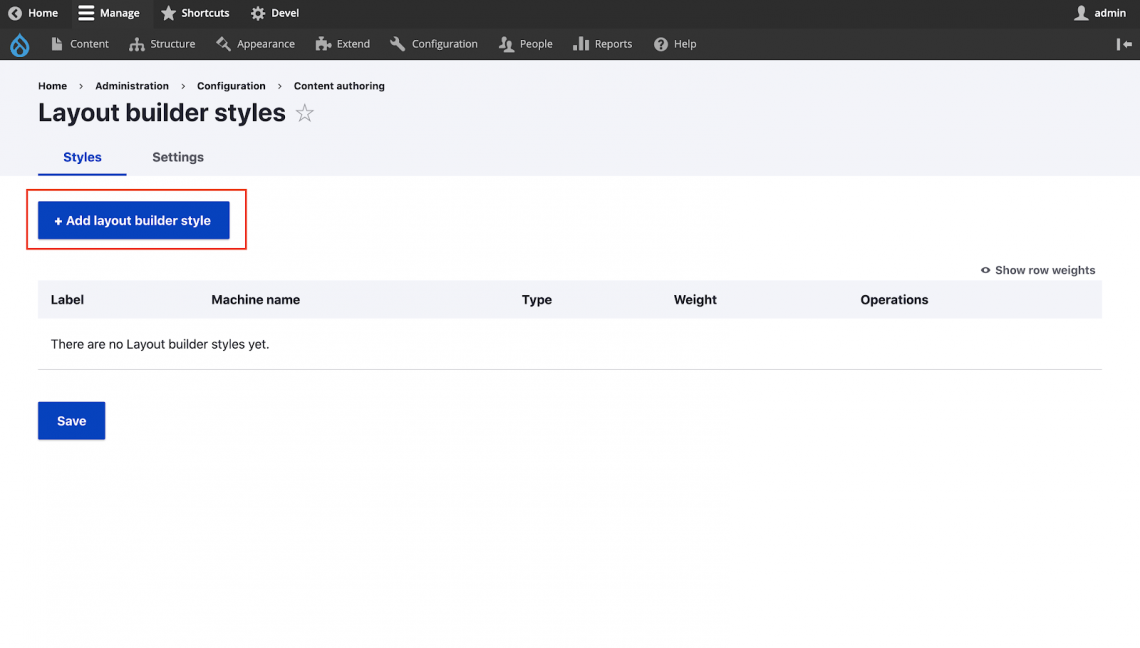
You can use contrib module Layout Builder Styles, to allow users to apply styles to their layout builder blocks and sections.
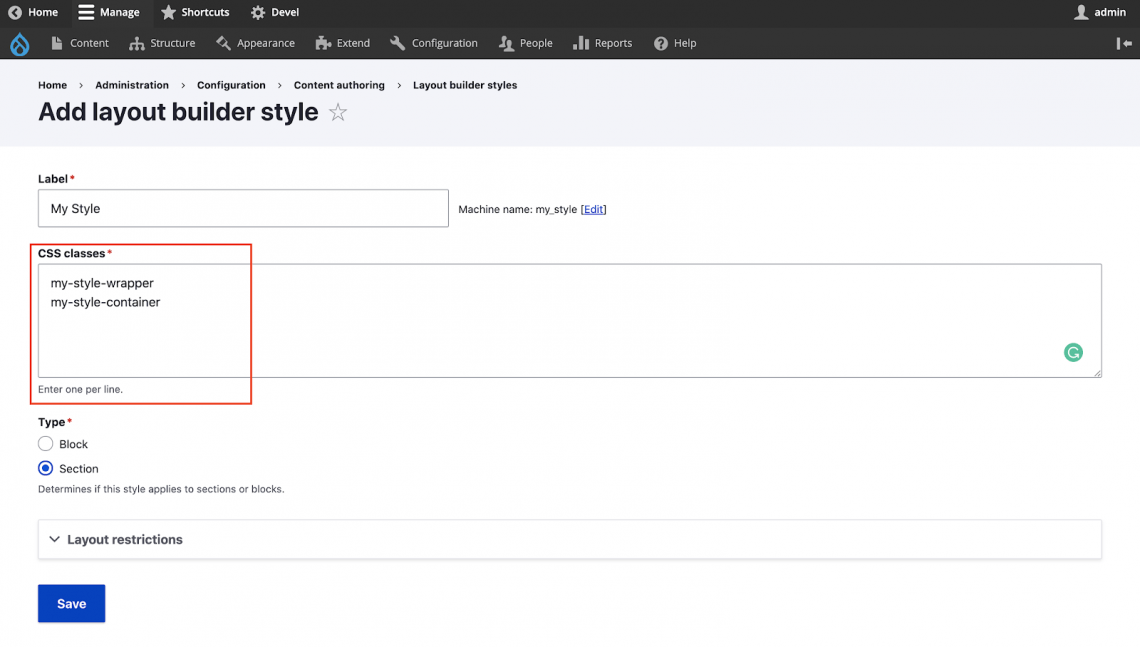
Install the module using Composer, and enable it in your project. Once done you will need to visit the modules configuration page - /admin/config/content/layout_builder_style, where you can add a layout builder style.
You can specify multiple classes for a layout builder style, and select type either block or section. Let's select a section.
Now when you visit the your layout builder page and edit any of the sections, you will get a Style field with the style which we created earlier
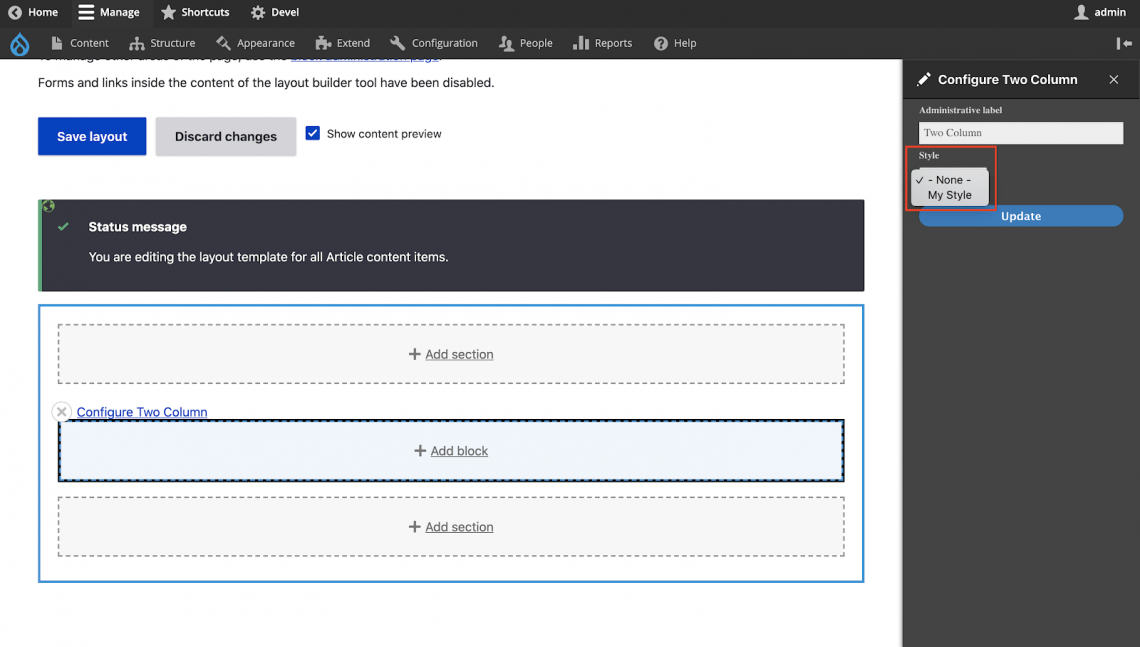
Now the CSS will be applied to your entire section, in the style which we have selected.